
Create a subdomain in cPanel & install WordPress
A subdomain can be considered a partner to your website’s main domain. It gives you the option to use the recognizable portion of your primary domain name, while adding a new element to it. It’s a bit like creating a second WordPress site.This new domain has all the opportunities any domain has, but also maintains a visible link to the primary one.
For example, our website’s primary domain is wpengine.com. Let’s say we wanted to run a separate WordPress installation explicitly designed to house an eCommerce store for branded merchandise. To do that, we could create a new WordPress page as a subdomain called shop.wpengine.com, and install and configure a fresh version of WordPress on it.
Once you’ve decided to add a new installation of WordPress on a subdomain, however, you’ll want to keep a few things in mind regarding Search Engine Optimization (SEO). Google specifically treats subdomains as separate and individual websites, regardless of how closely linked they are to your main website.
You can benefit from a subdomain in WordPress in the following cases:
You run an e-commerce website on your parent domain. You’ve decided to power a sound full-blown blog on top of it. Thanks to subdomains, you can have a WordPress site completely devoted to blogging on top of your e-store. When users click “Blog” on your e-store pages, they’ll be redirected to the subdomain.
And vice versa: you have a popular blog and want to have a functionally independent e-store. You install this e-store into a subdomain (e.g. shop.myblog.com)
Any other cases when two or more websites have slightly different purposes but still deal with the same subject matter. For example, you can take advantage of a subdomain to power a knowledge base for your clients.
You can also think of a subdomain used to host the mobile version of your website (m.mysite.com), or a local version of your website (uk.mysite.com).
These are the most popular and effective uses of subdomains. If you feel that there are definitely several ‘faces’ to your website, try using subdomains. In other cases, you should be happy setting up your site in the traditional way.
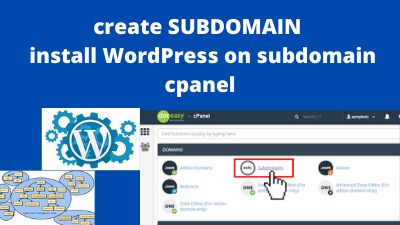
Step #1: Create a subdomain using cPanel
Before you can install WordPress, you must create the subdomain in cPanel. To do this, follow these steps:
Log in to cPanel
In the DOMAINS section of the cPanel home screen, click Subdomains.
Under Create a Subdomain, type the name of the subdomain that you want to add in the Subdomain text box.
Click Create. cPanel creates the subdomain.
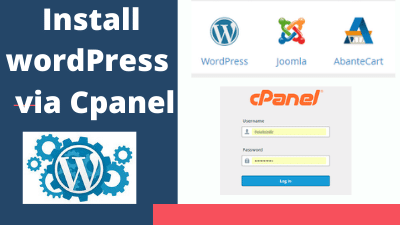
Step #2: Install WordPress using Softaculous
After you create the subdomain, you’re ready to install WordPress. To do this, follow these steps:
In the SOFTACULOUS APPS INSTALLER section of the cPanel home screen, click Softaculous Apps Installer. The Softaculous installer page appears.
In the Search text box, type wordpress and then press Enter.
Click Install. The installation page appears.
In the Choose Protocol list box, select the protocol.
In the Choose Domain list box, select the subdomain that you created in the previous procedure.
Leave the In Directory text box blank.
In the Site Name text box, type the site name. By default, the site name appears in the title bar of users’ web browsers when they visit your site.
In the Site Description text box, type the site description. By default, the site description also appears in the title bar of users’ web browsers when they visit your site.
To enable the WordPress Multisite feature (also known as WordPress Multiuser or WPMU), select the check box.
In the Admin Username text box, type the administrator username.
In the Admin Password text box, type the administrator password.
In the Admin Email text box, type the site administrator e-mail address.
In the Select Language list box, select the default language for the application.
To limit the number of login attempts, under Select Plugin(s), select the Limit Login Attempts check box.
Click the Advanced Options icon icon to expand Advanced Options.
In the Database Name text box, type the name of the database to create for the application, or accept the default value.
In the Table Prefix text box, type the database table prefix, or accept the default value.
If you do not want to receive e-mail notifications when application updates are available, select the Disable Update Notifications Emails check box.
To automatically update the application when updates are available, select the Auto Upgrade check box.
To automatically update plugins when updates are available, select the Auto Upgrade WordPress Plugins check box.
To automatically update themes when updates are available, select the Auto Upgrade WordPress Themes check box.
In the Backup Location list box, you can select a location to store application backups.
In the Automated backups list box, you can select whether or not Softaculous makes periodic backups of your application.
In the Backup Rotation list box, you can select how often Softaculous overwrites the oldest backup file with a new backup file.
To receive site configuration information after the installation is complete, type an e-mail address in the Email installation details to text box.
Review the installation options and settings, and then click Install. When installation is complete, Softaculous provides information about the WordPress configuration.
Use your web browser to visit the subdomain you created in the previous procedure. You should see the WordPress home page.
Comment (1)
Great