
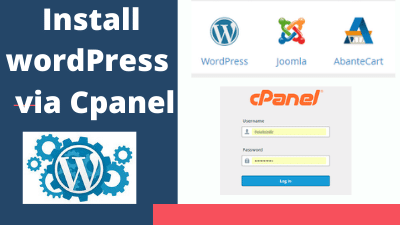
How to Install WordPress in cPanel
WordPress is one of the most popular Content Management Systems (CMS) that is used by millions of bloggers. According to Wikipedia, more than 30% of the top ten million websites run on WordPress.
WordPress has great features and wide support for developers since it was first released in May 2003. You can use WordPress attractive themes to run any kind of website including personal blogs, portals, and online shops.
WordPress maintains a central repository for its latest software releases at www.wordpress.org. You can download and set up the software manually or use an automatic script installer like softaculous.
In this guide, we will show you how to use softaculous to set up WordPress on your site via Cpanel. The entire procedure is fast, user-friendly and intuitive.
Step 1: Log to your Cpanel Account
You can login into your cPanel account by typing www.example.com/cpanel on your browser assuming ‘example.com’ is the primary domain name associated with your hosting account. Then, enter your username and password that you received from your web hosting provider when you set up an account with them.
Step 2: Locate Softaculous apps installer
On the next screen, you will see the Cpanel dashboard, locate the text box that reads, “Find functions quickly by typing here:” Just enter the name ‘Softaculous’. The script installer will be displayed below together with all apps that it supports. Click ‘WordPress’.
Step 3: Choose a protocol and a domain name
On the next screen, you will see a brief description of the WordPress version that you are about to install on your website, click on the button labeled ‘Install’. You will be taken to the ‘Software Setup’ page.
Choose your desired protocol. The recommended one is ‘http://www.’ or ‘https://www.’ Use https only if you have an SSL certificate for your domain.
Then choose your domain below. You can leave the ‘In Directory’ textbox blank unless you want to install WordPress under a subfolder.
Step 4: Fill WordPress site settings detail
Next, you will see your website settings .Enter the name of your website and a brief description. Then, choose an admin username, password, and email. You will need these details to log in to your WordPress admin panel, so choose a strong password. Select your preferred language and scroll down to proceed.
Step 4: Choose plugins and a theme
The next screen displays an option where you can install some plugins (this is optional), then choose your desired theme. Remember to supply your email address one more on the text box that reads, “>Email installation details to”. Finally, click on the ‘Install’ button.
You will then be taken to the congratulations screen as shown below and email with your WordPress installation details will be sent to the address that you entered above:
Congratulations, the software was installed successfully.
NOTE: Softaculous is just an automatic software installer and does not provide any support for the individual software packages. Please visit the software vendor’s website for support!
Regards,
Softaculous Auto Installer
Step 5: Test the Installation
Log in to your WordPress site by typing the administrative URL e.g. http://www.example.com/wp-admin/
Your installation is now complete and you will be taken directly to your WordPress dashboard.
Conclusion
That’s all when it comes to installing WordPress on your site from cPanel. As you have seen the overall procedure is quite straightforward and automatic. You don’t have to download the source code or create the database manually. Softaculous has done everything for us. You can see your WordPress site at a glance, customize it a little bit more and start writing blogs. I hope this guide will help you to successfully create a stunning WordPress site.
At a Glance:
Step 1: Log to your Cpanel Account
Step 2: Locate Softaculous apps installer
Step 3: Choose a protocol and a domain name
Step 4: Fill WordPress site settings detail
Step 5: Test The Installation
Leave a Reply